

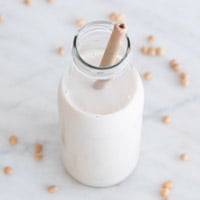
Soy milk is a great alternative to cow's milk. It's delicious, affordable, easy to make, and only requires 2 ingredients: water and soybeans.
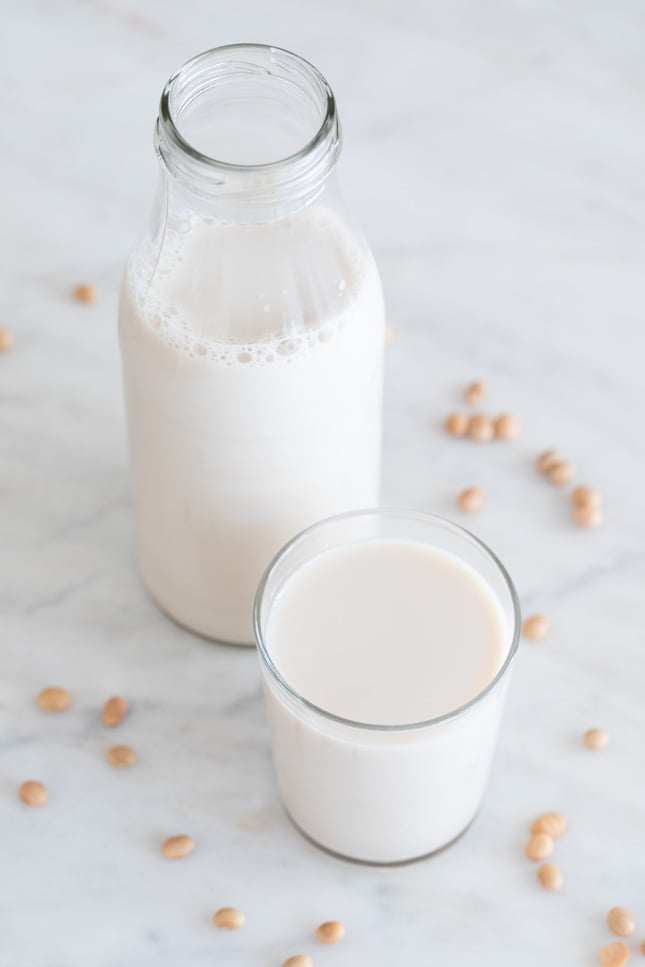
Soy milk is a delicious and healthy alternative to dairy milk. It is packed with nutrients and health benefits and this homemade recipe is way better than any beverage you can find at the grocery store.
It is dairy and lactose-free, so it is perfect for you if you have lactose intolerance. Besides, it only requires 2 simple ingredients! You actually need to blend the soy beans with water and then strain them using a nut milk bag.
How to make soy milk - Step by step
- Soak the soybeans in water overnight.
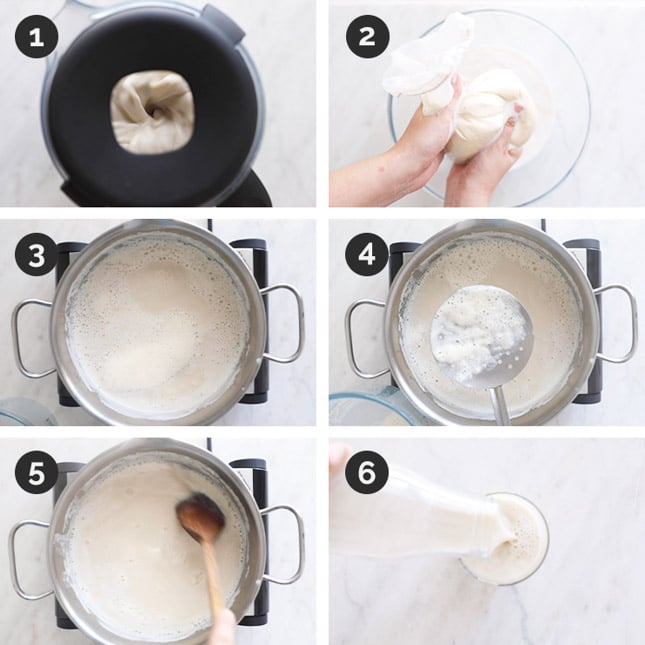
- Drain the soybeans and remove the outer skins. Then add them to a powerful blender and blend them with 3 cups or 750 ml of water until well blended and almost smooth (photo 1).
- Strain the blended mixture using a nut milk bag, a cheesecloth, a napkin or a fine mesh strainer (photo 2).
- Pour the mixture into a pot or a saucepan and add 1 cup or 250 ml of water (photo 3).
- Bring to a boil, stir and skim foam (photo 4).
- Cook over medium heat, stirring occasionally, for about 20 minutes (photo 5).
- Let the soy milk cool and enjoy it (photo 6).
Pro tips
- Use yellow soybeans, it's the best kind of soybeans to make this milk. They're a great source of protein. Soy protein is one of the best vegetable ones!
- Add more or less water depending on how thick you like your milk. However, it naturally tends to be thicker than other milk alternatives.
- Feel free to add any sweeter you want or don't add any sweetener at all. Add it gently until the milk tastes good.
- Some recipes call for a tiny amount of salt, but I prefer my milk salt-free.
- Feel free to add other ingredients like cocoa powder or ground cinnamon.
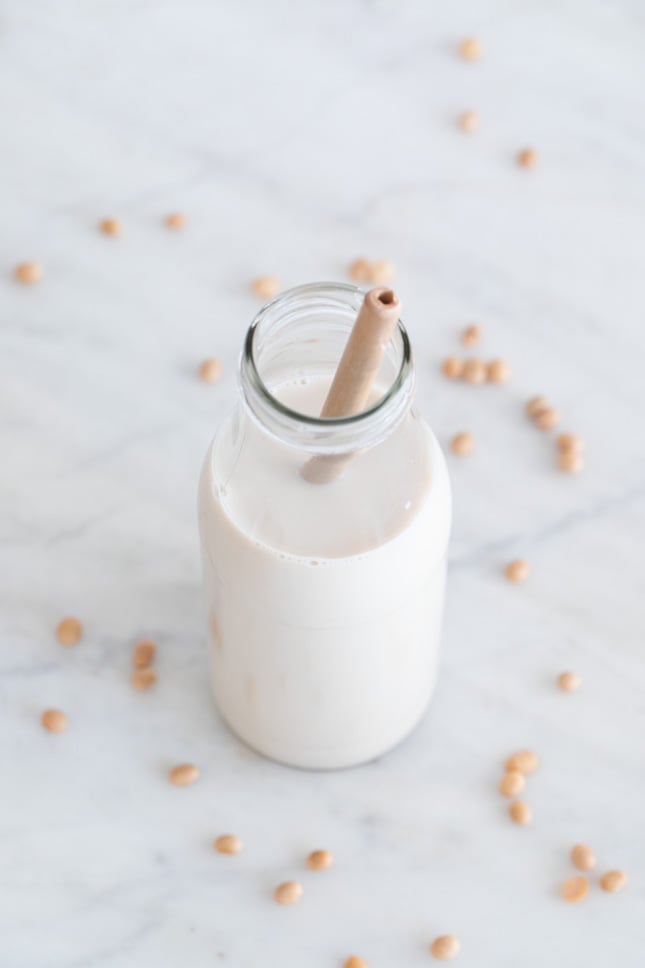
- Keep it in a sealed container in the fridge for about 3-5 days.
- Before you drink it you need to cook the milk, as soy is a legume and can't be eaten raw.
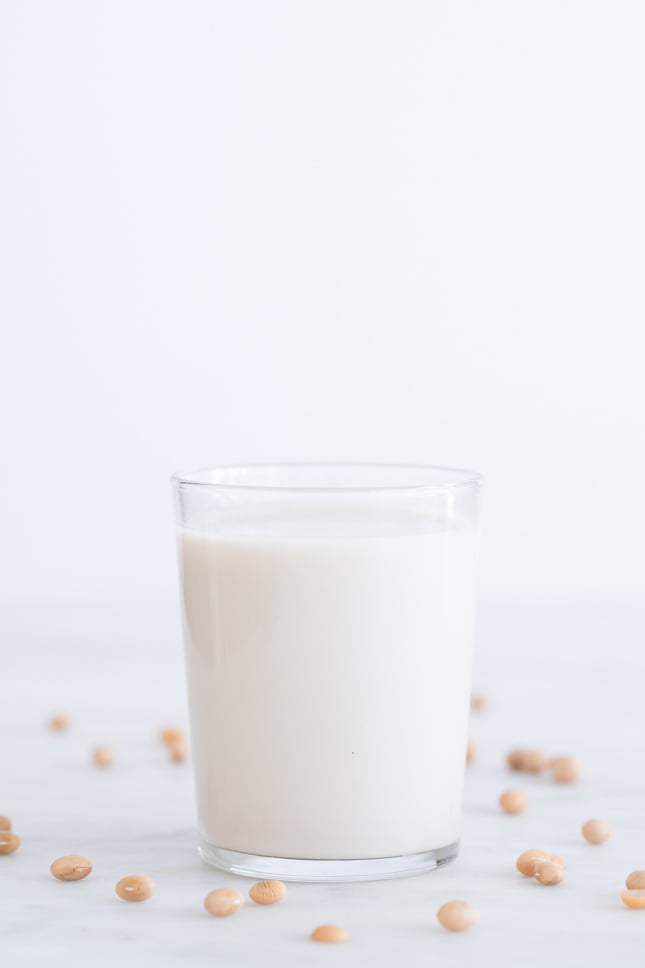
- You can use your soy milk to prepare recipes like vegan chocolate cake, vegan carrot cake, or vegan cheesecake, or have it with your cereal in the morning.
What is soy milk?
Soy milk is a type of plant milk. It is 100% plant-based and it doesn't contain cholesterol at all. I love to use it for baking because it has a thicker texture than other types of plant milk.
Is soy milk good for you?
Yes, it is! Unless you can't consume soy or it feels heavy in your stomach, this kind of plant milk is perfectly fine for consumption, as it has been in Asia for centuries. Just remember - if the milk has been in the fridge for some time and it smells bad, don't drink it.
Soy milk vs almond milk
Soy milk and almond milk are two different kinds of plant milk. I usually alternate between them and use them for different things; I use the first one for cooking and baking recipes, whereas I prefer to add almond milk to my coffee and smoothies.
Looking for more plant milk recipes?
Did you make this soy milk recipe?
Please leave a comment below, share it, or rate it. You can also FOLLOW ME on FACEBOOK, INSTAGRAM, and PINTEREST. I'd love to see what you cook!
Love it? Leave a rating!
Soy Milk
Ingredients
- ½ cup dried soybeans
- 4 cups water
- ½ teaspoon vanilla extract or a piece of vanilla bean, optional
- 4 dates, optional
Instructions
- Soak the soybeans in water overnight (ideally 12 hours or longer).
- Drain the soybeans and remove the outer skins. Removing the outer skins is optional, but your milk will have a better texture if you do.
- Add them to a powerful blender and blend them with 3 cups of water (750 ml) until well blended and almost smooth.
- Strain the blended mixture using a nut milk bag, a cheesecloth, a napkin or a fine mesh strainer.
- Pour the mixture into a pot or a saucepan and add 1 cup of water (250 ml). Bring to a boil, stir and skim foam.
- Cook over medium heat, stirring occasionally, for about 20 minutes.
- Let cool the soy milk. You can add other ingredients such as vanilla extract or dates. Blend the mixture if necessary.
- Keep the leftovers in a sealed container in the fridge for about 3-5 days.
Notes
- Use yellow soybeans, it's the best kind of soybeans to make soy milk.
- Add more or less water depending on how thick you like your milk.
- Feel free to add any sweetener you want or don't add any at all. Add it gently until the milk tastes good.
- Some recipes call for a tiny amount of salt, but I prefer my milk salt-free.
- Feel free to add other ingredients like cocoa powder or ground cinnamon.
Nutrition
Update Notes: This post was originally published in May of 2014, but was republished with new photos, step-by-step instructions, and tips in January of 2022.

Zhong says
Almond milk uses huge amounts of water.
Iosune says
Hi Zhong! Yes, but it's always a better option than cow's milk 🙂
Emily says
True, but I would encourage you to read this report. All plant based alternatives greatly reduce impacts to resources as compared to cow's milk. Almond is a thirsty crop and as they are grown in an area battling ongoing water issues, there are alternatives (such as soy), that may be a better fit.
https://www.bbc.com/news/science-environment-46654042
Iosune says
Of course! I just say it's a better option than cow's milk 🙂
Harper Brechin says
You stated that this recipe took 45 minutes to execute but upon further inspection it takes approximately 12 hours and 45 minutes to fully complete this activity and I feel as a consumer of said recipe that you should update the time accordingly I hope you take my suggestion to heart thank you
Iosune says
Hi Harper! You need 45 to cook it, soaking time is not included, as you don't have to do anything in those 12 hours 🙂
Hemant says
Do I need to store it for 4 or 5 days? Or I can just drink it after it is ready (after the boiling part).
Iosune says
Hi Hemant! You can drink it after it is ready, 4-5 days is the time you can keep it in the fridge 🙂
Liv says
Hi! Once you’ve removed the foam during boiling, do you keep scooping off the meniscus layer that forms at medium heat or is the idea to stir often enough that it doesn’t form?
Also, could you pop the dates in before heating then just drain any residual bits once cool instead of another blending?
Thanks so much!
Iosune says
Hi Liv! No, I don't. I've never tried it myself, but I think it's better to add them latter. Have a nice day!
Liv says
Super helpful, thanks 😀
Iosune says
You're welcome 🙂
Guillaume says
I blend the reconstituted beans then cook, then strain. My 1st and 3rd batches have come out great.
Iosune says
Hi Guillaume! Thanks a lot for your comment 🙂
John Chatfield says
My soymilk maker (SoyaJoy G3) grinds and then cooks the soaked beans. The recipe that came with it calls for filtering the milk after cooking. And their recipe calls for using 1/2 cup of beans per 1.3 to 1.6 liters of water. The milk produced is very thin. I have tried using more beans and it doesn't seem any thicker, just more okara. Some of the comments seem to indicate that the commenters are cooking their beans before straining as well. But your recipe calls for straining and then cooking. I wonder if this is my problem and that I should be straining before I cook and not straining after I cook. Proteins do coagulate during cooking. Perhaps this results in them being removed and thus thinning the milk when filtered after cooking. Perhaps if I strain before and not after, I can get thick soy milk like I fell in love with in China. Thoughts?
Iosune says
Hi John! Both ways are okay. I prefer this one because I find it more convenient and it works great for me 🙂
Guillaume says
My first batch came out great. My second batch I doubled it. No one touched it for 4 days in the fridge and now it has the consistency of yogurt. Do you know what went wrong? Is it good for anything else? Thanks.
David Reichard says
I have the same problem as guillaume. I use a Soyajoy and often after a few days, the milk turns very thick. I suspect some kind of microorganism is causing this, but it can happen even if I carefully sanitize everything. Other times, it separates into what looks like curds & whey. I used to make soy milk all the time and it went bad like this only rarely. Now it thickens or separates most every time. Any ideas?
Guillaume says
How much are you making. I've made several batches with just a 1/2 cup of dry beans and so far, so good. Doesn't last long enough for anything to happen to it. I think I made too much last time and it was a few days before anyone drank it.
Iosune says
Hi Guillaume! Thanks a lot for your comment 🙂
John Chatfield says
It must be that the beans are different or the water is different. I use bulk soybeans from the local chinese grocery and filtered Chicago tap water. Perhaps your water has some coagulants in it. (See https://en.wikipedia.org/wiki/Tofu) I suspect that those curds you have seen are the beginnings of tofu. Try a batch using distilled water and see what you get. My soymilk is always thin (like fat free cow's milk) and stays that way for over a week in the frig. I tried blending and filtering before cooking with no filtering post cooking. I cooked the soymilk in my Soyajoy and did not skim off the foam. I did remove the skin that formed on top of the cooked soy milk while it was cooling. This last time I made 1.6 liters of soymilk and so I used 108 grams of soybeans. I soaked the beans overnight in the frig, rinsed them and then blended them with 400 ml of water. I filtered out the okara. I then put the okara back in the blender with 400 ml of fresh water. Did this twice more until I had ~1.6 l of soymilk. The okara reduced significantly between the first and second blending but subsequently it didn't reduce much. But the milk didn't seem any thicker. Not even the first 400 ml was very thick. And cooking did not thicken it either.
Iosune says
Hi John! Thank you so much for your valuable comment 🙂
John Chatfield says
I checked it out online and the traditional method is to soak the beans at room temperature overnight or for about 8 hours. It was said that there was little risk in doing this so long as the beans were given a good rinse prior to the soad to remove any surface bacteria. Previously, I had been soaking them in the frig. The room temperature soak along with removing the skins gave me a much better soy milk. It seemed thicker. I think maybe the skins prevent the rest of the beans from being ground as fine. As expected, I ended up with significantly less okara, less than what would be expected from the skins being removed prior to cooking.
Iosune says
Hi David! Try to consume the milk in 3 days or keep it in an airtight container 🙂
Iosune says
Hi Guillaume! I'm so sorry the recipe didn't work for you. Did you use the same ingredients and follow all the steps? Try to keep it in an airtight container 🙂
diego says
hi, in monday i ve made 3l of soymilk( another recipe, but wherever). I made 2 yogurts with previously made yogurt and left the other litre in the fridge... Two days after it turned thick naturally... I have 2 hypothesis... I think any bacteria could have acidify and then the protein had precipitated... or... the water in marseille is really calcareous (calcium and magnesium high) so it is the beginning of tofu making (both minerals are used for that function).
The taste is OK, a bit acid.
But... i don't if i shall take it or not 🙂
Thanks for the comments !
Iosune says
Hi Diego! I'm not sure as it hasn't happened to me, but I wouldn't take it...
Jeanine says
Why does it have to be heated on the stove?
Iosune says
Hi Jeanine! Because you can't eat soy uncooked or raw 🙂
shirley says
Hi, well, I'm stuck at step 2: remove the outer skins. I bought a 25kg bag of organic soya beans, so I'm up for varied recipes. I have a pressure cooker which I use to cook the beans after an overnight soak. I haven't noticed any outer skins after soaking, only after cooking. any comment?
By the way, I find soya beans to be the most energy-giving of all the beans I've tried.
Oded Kleiner says
I found too, that the outer skins got separated after a short boiling of the beans. After removing them from the pan (most of them float in the water), I continued cooking the beans for 30min and then blended them.
Iosune says
Hi Oded! Thanks a lot for your comment 🙂
Iosune says
Hi Shirley! Just omit the step if you want, I think it should work 🙂
Chris says
I get a hard strainer (I have a plastic one) and use my hand to mix and rubs on the edges of the holes - peels them off nicely.
Iosune says
Hi Chris! Thanks a lot for your comment 🙂
Jeanne Genova-Goldstein says
I use soymilk that I make this way for tofu and for soy yogurt. It is a little labor intensive, but not difficult. You will need to get something as a coagulant. Also, mesh bags to drain the curds. Yogurt is easier
Iosune says
Hi Jeanne! Thanks for your comment 🙂
Jeremy Boland says
This recipe looks great, I was just wondering, could you apply the same concept to chickpeas to make chickpea milk to use for tofu.
Thanks
Jeremy
Iosune says
Hi Jeremy! Thanks a lot 🙂 I've never tried it myself, so I don't know, sorry!
Dorota says
I just made it and I love it! Thank you!
Iosune says
Hi Dorota! You're so welcome 😉